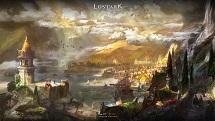
Guardian Raid T3-4: Lava Chrome

Clips from:

Just right click the YouTube video and click loop to get it to behave like a GIF.

Recommended Team Setup

Bard

Heavy Impairment

Destruction + Penetration Skills 

Optional Weapon

Recommended Items

Corrosion Bomb | Destruction Bomb | Penetration Bomb | Whirlwind Bomb

Recommended Runes

Fire Resistance

Recommended Engravings

Vital Strike (+10% Neutralization Effect) (On Warlords/Destroyers)


General Battle Mechanics

  • Lava Chromanium operates almost the same way as regular Chromanium.

  • You must still break its armor, but both destruction and penetration skills work on its armor.

  • Consider using a corrosion bomb before having your party apply any parts destruction effects.

  • Lava Chromanium does not inherit the "must break armor to start dealing normal damage" mechanic.

  • Every time Lava Chromanium runs, you must break its armor all over again.

  • When the bosses armor is still intact, the boss will periodically call down meteors every ~18 seconds.

  • The meteors knock you down and deal a decent amount of damage.

  • After breaking the bosses armor, the boss will run away after ~3 minutes.

  • To prevent the boss from running away during this time, you must knock the boss.

  • Knocking the boss makes it so the 2nd and 3rd knock become easier.

  • The boss will always run shortly after the 3rd knock. (Unconfirmed, I need more info)

  • The boss takes extra damage when knocked just like regular Chromanium.

  • Because the boss doesn't run away unless the armor breaks, sometimes teams would just bring full damage team comps with few parts destruction skills to DPS the turtle down.

  • The boss will periodically spawn volcanoes.

  • Usually teams only kill one volcano to make sure they have room to DPS as referenced below in the video.

  • Teams may sometimes use a whirlwind bombs or ults to hit both the volcano and boss to not lose DPS.

  • If you opt to not kill at least 1 volcano, make sure to drag the boss out.

  • The volcanoes will spew rain around itself after a time.

  • The volcanoes will explode after a time. Make sure you're not near the volcano when it happens.

  • It has a large explosion radius as you can see in the below video.

  • At around 30% health, the boss will periodically use an AoE flame that spreads outwards.

Moveset

Rain

  • This move is only used when the boss still has its armor. Burrows into the ground and then uses rain.

  • The boss may use this move after a "lunge forward - turn body slam" chain or after a single lunge forward.

  • While the boss may not always burrow after these attacks, the burrow is always preceded by these attacks.

Eruption (2 Types)

  • The 1st type is exactly the same as the move used by regular Chromanium.

  • The second type of eruption is used after a set attack sequence.

  • Gathers air near his legs before jumping up -> Turn Body Slam -> Lunge Forward -> Eruption.

  • If you have a warlord in your party, the warlord can always interrupt the boss by taunting.

  • You can see the boss being taunted in the middle of its attack sequence.

Flame Breath (2 Types)

  • The boss telegraphs this by gathering air and by "sliding" to its aggroed target before using the attack.

  • The attack zone covers a 180 degree cone.

  • This flame breath is also telegraphed by gathering air and "sliding" to its aggroed target.

  • Instead of covering a 180 cone, it covers a straight line.

Body Slam (3 Types)

  • Frontal body slam.

  • Side body slam.

  • Turns and jumps while doing a body slam.

Body Slam (3 Types)

  • Single lunge.

  • Double lunge.
  • Double lunge but switches directions after the 1st lunge.

Cannon

  • Single cannon shot AoE.

Bombardment

  • Multiple small AoEs.

Posted by Yaen
Guardian Raid T3-3: Calventus

Clips from:

Just right click the YouTube video and click loop to get it to behave like a GIF.

Recommended Team Setup

Bard

Optional Weapon

Light Weapon

Optional Items

Molotov | Panacea | Talisman | Flash Bomb

Recommended Runes

Dark Resistance

Optional Engravings

Heavy Armor | Shield Penetration (50% Extra Damage vs Shields)


General Battle Mechanics

  • The bosses dark attacks will apply a stacking debuff. Each debuff reduces armor by 10%.

  • The boss has 2 phases and an enrage phase. When you first encounter the boss, it will be in his 1st Phase.

  • When the boss TP's away, it will start at his 2nd Phase.

  • The 2nd phase is signaled by an AoE rain. There are 2 situations where this can occur.

  • The 1st situation is after the 1st knockdown. After getting back up, it will do it's AoE attack.


  • If you don't knock the boss, the boss will automatically use the AoE rain after ~3-4 minutes.

  • This starts the 2nd phase.

  • During the 2nd phase, the boss will periodically call down 4-5 dark orbs that move toward the boss.

  • The orbs can be staggered and the boss will not absorb them when the orbs are being engaged.

  • Allowing the boss to absorb ~4-5 orbs will enrage the boss. The enraged mode is signal by this attack.

  • Enraged mode will give the boss new and stronger attacks as well as higher attack speed.

  • You will also know when it's enraged when its eyes glow blue and leave an afterimage when moving.

  • The boss will still call down orbs, but these orbs are grayish in color and don't move to the boss.

  • Moving close to these orbs will make the orbs move toward you.

  • They explode on contact and apply the armor debuff.

  • Once enraged, you have to knock the boss to make it go back to its 2nd phase.

  • This is shown below. Once the boss gets back up from its knockdown, the stationary orbs disappear.

  • The soulmaster ult is not the one clearing the orbs.

Moveset (1st Phase)

Tail Swipe

  • The tail swipe can be confusing for newer players.

  • The tail swipe telegraph is easy to notice. The boss will look back at the side it wants to swing its tail to.

  • The tail will be brought down in the middle. The boss will move diagonally to the other side.

  • Then the boss will tail swipe the side it was originally looking at.

  • Easiest way for melee to dodge all future swipe attacks is to stand diagonally to the boss's back.

  • This way, you dodge the initial tail swipe slam down the middle.

  • Then you move towards the middle where the tail landed to dodge the swipe.

Charge

  • The boss will telegraph its charge. There will be an AoE around himself at the end location of its charge.

Double Pound

  • Self-explanatory.

Single Pound

  • Self-explanatory.

Double Pound into Single

  • Self-explanatory.

Combo Pounds

  • When the boss switches aggro, the boss likes turning around and following up with a pound attack.

Sky Attack

  • Jumps up into the air for a bit before landing forward and doing a cone AoE attack.

Sky Drop

  • Flies up into the air before landing back down on a target.

Backstep

  • No damage for 1st phase backstep.


Moveset (2nd Phase - Inherits 1st Phase Moves)

Upgraded Backstep

  • The backstep during the 2nd Phase spawns whirlwinds that move forward.

  • 2 whirlwinds spawn in front before the whirlwinds on the side.

  • You can dodge the whirlwinds as shown below if you're in front when this happens.

Rain

  • Flies slowly up into the air before using its rain attack.

  • Safe spot is in the middle. Before it lands, make sure to dash out of the safe area before it lands.

Shadow Ball

  • Arches its back before launching a shadow ball at a target.

Triple Shadow Ball

  • An orb appears at the front before the boss splits it into three orbs that go outward.

Moveset (Enraged Mode - Inherits Previous Phase Moves)

Enraged Charge

  • When enraged, its charge becomes almost instant and he uses it back to back.

Enraged Shadow Ball

  • Arches up and uses a huge shadow ball attack.


'Unsorted > Guardian Raids Unsorted' 카테고리의 다른 글

Guardian Raid T4-1: Heavy Armor Nakrasena  (0) 2019.03.17
Guardian Raid T3-4: Lava Chromanium  (0) 2019.03.17
Guardian Raid T3-2: Regi Bros  (0) 2019.03.11
Guardian Raid T3-1: Levanos  (0) 2019.03.11
Guardian Raid T2-4: Berutooth  (0) 2019.03.11
Posted by Yaen

Guardian Raid T3-2: Regioros Brothers


Picture Image: http://www.inven.co.kr/webzine/news/?news=212659&site=lostark

Recommended Team Setup

Any

Optional Weapons

Fire Weapon (Ice Regioros) | Light Weapon (Dark Regioros)


Optional Runes

Water/Dark Resistance

General Battle Mechanics

  • Their attack speed has increased but their attacks have not changed.

  • The bosses will periodically teleport every minute unless being engaged in battle.

  • One person handles Dark Regioros and the others with fire weapon handle Frost Regioros.

  • After Frost Regioros has died, the 3 go and help kill Dark Regioros.

  • If you see both bosses at the same position, wait until 19:00, so they will teleport away.

  • If during the battle, a boss TP's away onto the other, just run away and wait for the next minute to come.


'Unsorted > Guardian Raids Unsorted' 카테고리의 다른 글

Guardian Raid T3-4: Lava Chromanium  (0) 2019.03.17
Guardian Raid T3-3: Calventus  (0) 2019.03.16
Guardian Raid T3-1: Levanos  (0) 2019.03.11
Guardian Raid T2-4: Berutooth  (0) 2019.03.11
Guardian Raid T2-3: Hellgaia  (0) 2019.03.11
Posted by Yaen

Guardian Raid T3-1: Levanos


Clips from:

https://www.youtube.com/watch?v=IaHbDINMoBk

https://www.youtube.com/watch?v=1k-p21RiJa4


Just right click the YouTube video and click loop to get it to behave like a GIF.

Recommended Team Setup

Bard

Impairment

Recommended Weapon

390 ilvl Fire Elemental Weapon (Extra Damage vs Levanos)

Recommended Items

Beginner Bomb

Optional Items

Corrosion Bomb | Destruction Bomb | Penetration Bomb | Molotov

Recommended Runes

Earth Resistance

General Battle Mechanics

  • Levanos has the same armor mechanics as Chromanium.

  • Destruction and penetration both work on Levanos, but penetration skills are less consistent.

  • Unless you're using penetration skills at the right angle, it won't affect the boss at all.

  • The boss's armor break animation is shown below.

  • The boss will periodically try to regenerate it's armor. The animation is below.
  • You must impair the boss during this time or else you will have to break its armor all over again.
  • At around 30% health, the boss will turn red and start Phase 2. 
  • The boss also regains its armor back so you must break its armor again.
  • A possible recovery move from an armor break, full knockdown, or core kill is shown below.
  • This is one of the bosses normal moves, but he is likely to use it after a core kill.
  • The boss will periodically summon up to 4 cores. You must kill these cores ASAP.
  • The core will usually teleport to another place after spawn.
  • Prenerf KR, the boss would usually TP during the 3rd core because teams could not kill the core in time.
  • I doubt that will be the case in RU. If the boss does TP away, you have to break its armor again.
  • You may want to use molotovs on these cores but again, I doubt that will be needed on RU.
  • The cores have mini versions of the bosses attacks, which are shown below.

Moveset (1st Phase - Above 30% Health)

Whirlwind (2 Types)

  • This is a move that is the most dangerous for unprepared players.
  • The telegraph is distinct and easily recognizable. 
  • The boss will raise its arms in the air and bring them down quickly before doing the attack.
  • This second type of whirlwind has almost the same telegraph, but the boss does it a lot slower.
  • The boss will then use whirlwind while moving forward.

Bombardment

  • The sound the boss makes for this move is very distinct. The boss will raise its arm up high for this attack.
  • The AoE's appear around an aggroed target.
Ghost Jets
  • Hard to describe the telegraph for this move but you will get used to it after a while.
  • It's also telegraphed by 4 blue spawn points that center at the boss.
Rain
  • The animation for this move is fairly slow. You will have ample time to notice the move.
  • After a short while, AoE's will come falling down.
Smash (2 Types)
  • Raises its arms before bringing them down to attack the front.
  • Almost the same telegraph as the previous move, but will do a huge frontal AoE cone as well.
Backstep (3 Types)
  • The boss has 3 possible followup attacks to its backstep ability.
  • The first possible is bombardment.
  • The second possible follow up is the smash frontal AoE cone.
  • The third possible is a moving whirlwind.
Flames
  • Summons 3 flames. Standing in them causes damage.

Moveset (2nd Phase - Below 30% Health)

Cage

  • RU will most likely have the nerfed cage move where the cage radius is large and very forgiving.
  • Players trying to exit the cage will be pulled back inside and take damage.
  • The cage will wear off after a while.

Upgraded Ghost Jets

  • During the 2nd phase, the ghost jets spawn away from the center of the boss.

Snare

  • The boss can place down snares during the 2nd phase.


'Unsorted > Guardian Raids Unsorted' 카테고리의 다른 글

Guardian Raid T3-3: Calventus  (0) 2019.03.16
Guardian Raid T3-2: Regi Bros  (0) 2019.03.11
Guardian Raid T2-4: Berutooth  (0) 2019.03.11
Guardian Raid T2-3: Hellgaia  (0) 2019.03.11
Guardian Raid T2-2: Nakrasena  (0) 2019.03.11
Posted by Yaen

Guardian Raid T2-4: Berutooth


Clips from: https://www.youtube.com/watch?v=jEbLOYSbU4U


Recommended Team Setup

Bard

Impairment

Optional Items

Panacea | Whirlwind Bomb

Recommended Runes

Water Resistance | Stun Immunity (100%)

General Battle Mechanics

  • The boss will run away automatically when it reaches 70% and 40% health.

  • The boss enters its 3rd phase at 30% health.

  • The boss's 2nd phase is barely any different from its 1st phase, so I will not be differentiating them.

  • The boss will periodically turn red during each phase as shown below.

  • You can accelerate this phase by knocking the boss.
  • If the boss is not red when you knocked him initially, he will turn red after getting back up.
  • If you've knocked the boss when it has already turned red, it's recovery attack will be a jumpback.
  • The tail is able to be cut during this time, but it is not worth it because it just accelerates him to Phase 3.
  • The boss will periodically try grabbing players. The telegraph is easy to notice and the arcana below dodges it.

  • If players get CC'd, they are priority targets for getting grabbed.

  • When someone gets grabbed, make sure to use as much impairment skills to break him free ASAP.
  • During the boss's 3rd phase, any player he CC's, will be a priority target for his Charge attack.
  • This CC includes his tail swipe and his freeze bomb.
  • The boss has a high tendency to telegraph who his next aggroed target is and who he will use his next attack on. When he has chosen a target to attack, he will "slide" to face him and use a skill as shown below.


Moveset

Tail Swipe

  • One of Beru's most annoying moves especially for melee is his tail swipe attack because it stuns you.

  • It's telegraphed by him swaying his tail in the direction of the swipe before attacking.

Dive

  • When running away, it's ideal to run away together in a group so that there is less downtime for attacks.

  • If a teammate is lagging behind, that person should just run in another direction because the boss might pop out beneath them.

  • Safest option is running in 4 directions away from each other.

360

  • Easily telegraphed.

Freeze Bomb

  • Screams and AoE circles appear. Frozen players have a high chance of getting grabbed.

Breath

  • Sucks in players then breaths them away.

Charge

  • Easily telegraphed.

Claw Swipe

  • Double claw swipe. Easily telegraphed.

Lunge

  • Easily telegraphed.

Ice Ball

  • Easily telegraphed.

  • During the 3rd phase, the iceball becomes triple.


'Unsorted > Guardian Raids Unsorted' 카테고리의 다른 글

Guardian Raid T3-2: Regi Bros  (0) 2019.03.11
Guardian Raid T3-1: Levanos  (0) 2019.03.11
Guardian Raid T2-3: Hellgaia  (0) 2019.03.11
Guardian Raid T2-2: Nakrasena  (0) 2019.03.11
Guardian Raid T2-1: Chromanium  (0) 2019.03.10
Posted by Yaen

Guardian Raid T2-3: Hellgaia


Clips from: https://www.youtube.com/watch?v=3N4B0S4uBGE


Just right click the YouTube video and click loop to get it to behave like a GIF.

Recommended Team Setup

Bard

Heavy Impairment

Optional Items

Panacea | Talisman | Whirlwind Bomb

Recommended Runes

Fire Resistance | Burn Immunity

General Battle Mechanics

  • Most of Hellgaia's attacks apply a burn debuff which can stack.

  • Gaining too many burn debuffs will make your health disappear relatively quickly.

  • Use a panacea in case that ever happens to remove the debuff.

  • Every 40 to 50 seconds, Hellgaia will try to evolve. The team must use their impairment skills to interrupt.

  • If you fail to break the boss, the boss will create an AoE explosion around him.

  • Hellgaia has two evolutions.

  • Each successful break on an evolve attempt makes the next attempt by Hellgaia harder to break.

  • Most teams on Korean release did 431, i.e. Break the first 4 evolves, let it evolve, break the next 3 evolves,let it evolve, break.

  • I don't know how much easier it is now to break Hellgaia on RU.

  • During the time you want to let him evolve, have a bard either ult so you can keep damaging the boss.

  • Either that or all of you run away from the boss. Sometimes a bard shield may even be enough.

  • There are 3 phases, with the 2nd and 3rd phase adding a new move and an upgraded move.

  • The sequence goes like this: 1st phase -> evolve -> 2nd phase -> evolve -> 3rd phase.

  • After it evolves 2 times, it won’t try to evolve anymore. You must knock the boss ASAP.

  • After you knock the boss, the boss will do a sky attack, then shout before running away.

  • Having it run away resets it back to the 1st phase.

  • If your team don't have enough impairment, consider doing 331 or maybe even less breaks.
  • Other variations include 401, where you try and reset the boss asap to the 1st phase.
  • This is because the sky attacks during 2nd phase are one of the most annoying attacks in his kit.


Moveset (1st Phase)

Swipes (2 Types)

  • Tail swipe. Safe area is right up on Hellgaia's butt. The damage cone is away from the butt.

  • Wing swipe. Again, the safe area is right on Hellgaia's butt.

Beak Attacks (2 Types)

  • Single beak attack which sends you flying up to the bosses backside.

  • Double peck on the ground which staggers.

Fireball

  • Fires a projectile.

Charge

  • If you're caught at the front, it will send you flying backwards at the end of the attack.


Moveset (2nd Phase) (Inherits 1st Phase Moveset)

Upgraded Fireball

  • Single fireball turns into three.

Sky Attack

  • If you're standing directly on Hellgaia's butt, you will have an annoying time trying to dodge this attack.

  • Her body blocks you if you try dashing through her.

  • Best to stay on the left side or right side of the butt.

  • This way you can still back attack and dash perpendicular to the boss.


Moveset (3rd Phase) (Inherits 2nd Phase Moveset)

Upgraded Charge

  • This upgraded charge leaves a trail of fire.
Rain
  • Hellgaia will slowly ascend into the sky and bombard you with fire. 
  • Use the nearest ladder or rope to move to another area unless you're super confident in dodging its attacks. Its attacks won't hurt you there.
  • After a short time it will land.


'Unsorted > Guardian Raids Unsorted' 카테고리의 다른 글

Guardian Raid T3-1: Levanos  (0) 2019.03.11
Guardian Raid T2-4: Berutooth  (0) 2019.03.11
Guardian Raid T2-2: Nakrasena  (0) 2019.03.11
Guardian Raid T2-1: Chromanium  (0) 2019.03.10
Guardian Raid T1-4: Dark Regioros  (0) 2019.03.10
Posted by Yaen

Guardian Raid T2-2: Nakrasena


Clips from:

https://www.youtube.com/watch?v=OqluK1IQAx8

https://www.youtube.com/watch?v=jtTwO5gtBM8


Recommended Team Setup

Bard

Impairment

Recommended Items

Grey Shuriken


Optional Items

Corrosion Bomb + Blue Shuriken

Optional Runes

Lightning Resist

General Battle Mechanics

  • There is a slight learning curve to this fight as it can be a bit hectic for new players.

  • To make this fight easier, people generally try cutting the tail off during the fight.

  • You can only cut the tail when you impair the boss as referenced below in the video.

  • It takes 16 cutting levels to cut the bosses tail. Grey shurikens have 2 cutting power.

  • Blue shurikens have 3 cutting power. Corrosion bomb adds 1 power to all applied effects.

  • So the 1st option is to use 8 grey shurikens over 2 knocks

  • The 2nd option is to use 1 corrosion bomb and 4 blue shurikens to just cut the tail in 1 knock.

  • Various skills from classes like Berserker and Battlemaster have cut in their skills.

  • When you first encounter the boss, it will not be able to use any of its lightning attacks.

  • It will first charge itself up as shown below 1 time and then a 2nd time ~45 seconds later.

  • After charging up, some of its attacks gets upgraded and they have additional properties.

  • There are only 2 charge phases and the 2nd phase allows it to use more attacks.


Moveset

Claw Swipe (Enhanceable)

  • Slams its claws down in quick succession before swiping forward.

  • Attack will deal more damage when it goes through charging phase.

Side Swipe (Enhanceable)

  • Raises its claw upwards before swiping to the side.

  • Attack will deal more damage when it goes through charging phase.

Crush Claw (Enhanceable)

  • Arches backward before bringing down his claws in the front.

  • Attack will deal more damage when it goes through charging phase.

Breath

  • Arches backward before doing a double spit attack. The attack slows.

Double Jump (Enhanceable)

  • Raises its claws upward before jumping up. The boss can do this twice in a row. It may also only do it once.

  • When used after its charging phase, it will paralyze players if you get near its landing location.

Single Jump (Enhanceable)

  • Raises its claws upward before jumping up once. The damage is dealt on landing location.

  • When used after its charging phase, it will paralyze players if you get near its landing location.

Tail Swipe (Enhanceable) (Unavailable When Tail is Cut)

  • While it may look like its attack range is huge, the tail doesn't cover the front side.

  • You can dodge the attack by running away or moving to its side like below.

Spawn Scorpions

  • A golden glow will appear in the middle of its body.

  • A short duration later, mini scorpions will spawn.

Backstep (Unavailable When Tail is Cut)

  • Staggers players when it backpedals.

Charge (Unavailable When Tail is Cut)

  • Knocks back players when hit. Deals damage at landing location.

Burrow (Unavailable When Tail is Cut)

  • This attack takes some time to get used to. The boss will burrow and target one player.

  • There's a window in which the boss will reappear that you have to dodge to avoid the attack.

Bongos (Unavailable When Tail is Cut)

  • The boss will slam the ground in rapid succession mimicing the sound of bongos.

  • The boss will then ground its tail and mini AoE's appear. It is best to just run away from the boss.

Laser (Unavailable When Tail is Cut)

  • This attack is telegraphed by its tail charging up and turning its head to the aggroed player.

  • Then it will shoot its laser twice and paralyze anyone hit.

  • You can avoid this attack by just running from side to side. No space required.

  • Make sure to avoid running into your teammates.

  • If someone does get hit, they get picked up. You must impair the boss for the person to be freed.

  • If you don't impair in time, the person will most likely die.

Lightning Strike (Unavailable When Tail is Cut)

  • Uses the same animation when it's charging up through its charging phase.

  • AoE will target one player. Make sure not to run into your teammates.


'Unsorted > Guardian Raids Unsorted' 카테고리의 다른 글

Guardian Raid T2-4: Berutooth  (0) 2019.03.11
Guardian Raid T2-3: Hellgaia  (0) 2019.03.11
Guardian Raid T2-1: Chromanium  (0) 2019.03.10
Guardian Raid T1-4: Dark Regioros  (0) 2019.03.10
Guardian Raid T1-3: Ice Regioros  (0) 2019.03.10
Posted by Yaen

Guardian Raid T2-1: Chromanium


Clips from: https://www.youtube.com/watch?v=7LFYB-6e1Ko


Recommended Team Setup

Destruction

Heavy Impairment

Useful Items

Beginner Bomb

Optional Items

Corrosion Bomb | Destruction Bomb | Whirlwind Bomb

General Battle Mechanics

  • Use all your bombs and destruction skills on CD to break the turtle's shell ASAP.

  • Your team must also use all the skills that impair the boss .

  • Your team will do severely reduced damage until that happens.

  • Damage done to the boss is increased when the boss experiences a full knockdown.
  • You will deal decreased damage until you break the armor and do at least 1 full knockdown.
  • If you just knock the boss without breaking the armor, you will deal reduced damage once he gets back up.
  • IMPORTANT: Save all the skills that do not cause destruction or impairment for the 1st knockdown.
  • Use all burst skills once this happens like bard ultimate and crit buff, soulmaster buffs, etc.
  • After the boss runs away, you will not have to break its armor again.
  • But you still will have to knock the boss to do full damage again.
Full Knockdown vs Armor Break
  • The sounds are different for both animations.

  • Turtle gets back up quickly for his armor break, but a full knockdown lasts for a much longer time.

  • After you experience it in the game, it should be easy to differentiate between an armor break and a knock.

  • The below video is reference for both knock (1st), and armor break (2nd) sounds.


Moveset

Stones

  • Charges up, hops up, then fall back down. You will see something swirling on his legs.

  • Either he will go back to his normal attack rotation or he will follow up with a large AoE attack.

  • If you want to be extra safe, just move away regardless and wait.

  • He will lift up his front two legs, and then will followup with an aftershock. Move away to a safe distance.

Cannon (2 Types)

  • The cannon glows orange as it fires.

  • The first type is a single cannon shot that hits multiple times in a single area.

  • The cannon glows purple as it fires.
  • The second type is a cannon shot which drops a orb drone that follows the target.
  • If you get hit, you get stunned for a short amount of time.
Rain
  • Instead of a normal cannon shot, Chromanium will fire multiple shots.
Body Slam (2 Types)
  • Side slam. Easily telegraphed.
  • Front slam. Easily telegraphed.
Orbs
  • Summons four orbs. When summoned, slows users around the turtle. Deals damage around the orbs.

Breath (2 Types)

  • Line breath.

  • AoE cone breath.

Jump (2 Types)
  • Single forward jump.
  • Double jump. Sometimes the boss likes to jump multiple times in succession.


Under 25% Health Battle Mechanics
Upgraded Cannon
  • His cannon shot will leave behind a persistent AoE on the floor.

Upgraded Orb Spawn
  • When he summons his 4 orbs, they will turn purple and act as gravity wells, pulling you inwards.


'Unsorted > Guardian Raids Unsorted' 카테고리의 다른 글

Guardian Raid T2-3: Hellgaia  (0) 2019.03.11
Guardian Raid T2-2: Nakrasena  (0) 2019.03.11
Guardian Raid T1-4: Dark Regioros  (0) 2019.03.10
Guardian Raid T1-3: Ice Regioros  (0) 2019.03.10
Guardian Raid T1-2: Urunil  (0) 2019.03.10
Posted by Yaen

Guardian Raid T1-4: Dark Regi


Clips from

https://www.youtube.com/watch?v=TvjUHajG5ks

Orsted and his guildmates


Recommended Team Setup

Any

General Battle Mechanics

  • Getting hit by magic attacks will apply darkness stacks. Receiving darkness stacks reduces vision.

  • At 4 darkness stacks, Dark Regi will blink and reappear behind the guy and attack with double claws.

  • Keep the boss pinned to a wall so you do not need to move around much. 

  • Reference below. Boss jumps back to a wall, reducing the need to chase after it.

Non-Combo Moveset

Breath

  • Stationary breath attack.

Rain
  • The first type is inner rain.
  • The second type is an outer bombardment telegraphed by the boss standing on his hind legs.
  • After the outer, will he do an AoE explosion around himself after it ends, so run away after.

Single Swipe
  • The boss turns around before doing a single swipe. This single swipe always leads into an attack.
Double Swipe (Two Types)
  • The 1st is a double side to side swipe. First swipes clockwise, does a 180, then swipes counterclockwise.
  • Dodge by moving side to side or having a bard shield the team.
  • Double frontal swipe.


Combo Moveset

Charge -> Blink or Backstep

  • Telegraphed by his right leg winding up. (Left from this PoV).

  • If you have a warlord, you can taunt him. Do not taunt him before he rushes.

  • After charging, he can do one of two things. The first thing he can do is a backstep.

  • The other thing he can do is disappear then reappear elsewhere a short duration later after charging.

Backstep -> Breath

  • Backsteps into a breath attack. Make sure to either chase ASAP or run away from the breath.

Blink -> Breath or Double Swipe

  • After blinking, the boss will reappear elsewhere and might use double swipe.

  • After blinking, the boss will reappear elsewhere and might use breath.


'Unsorted > Guardian Raids Unsorted' 카테고리의 다른 글

Guardian Raid T2-2: Nakrasena  (0) 2019.03.11
Guardian Raid T2-1: Chromanium  (0) 2019.03.10
Guardian Raid T1-3: Ice Regioros  (0) 2019.03.10
Guardian Raid T1-2: Urunil  (0) 2019.03.10
Guardian Raid T1-1: Lumerus GIF Ver.  (0) 2019.03.10
Posted by Yaen

Guardian Raid T1-3: Ice Regioros


Clips from: https://www.youtube.com/watch?v=FliADn3W07g


Recommended Team Setup

Any

General Battle Mechanics

  • Most players (melee) have problems dodging this one skill where the boss jumps backwards.

  • After jumping backwards, he uses frost breath as shown below.

  • This move is telegraphed by doing a 360 while backstepping.

  • You just have to ready to dodge ASAP after it backsteps.

  • Sometimes it does a shout before doing it, but not all the time. This is also a telegraph for another move.

  • If you knock/break the boss, it will do an explosion AoE around itself after getting back up.

  • Make sure to run away before it recovers.

  • The boss can also do its explosion without the knockdown prerequisite. 
  • It always arches its head up, shouts, and turns 180 before doing this move. 
  • That doesn't mean that every time the boss arches his head and turns 180, he will do it.
  • It's just that the explosion is always preceded by that telegraph.

Moveset

No Damage Backstep

  • This is different from the backstep which does damage because it doesn't do a 360 while going back.

Jump
  • The boss will turn towards an aggroed target.
  • Then he will do a roar and then jump up and land back on someone's location.
  • You will get stunned if you stand near the location.

Triple Jump

  • He will turn towards an aggroed target and stomp his two feet.

  • This is the telegraph that he will do 3 consecutive jumps on the person he turns towards.

  • Just keep running in a straight line, do not move backwards and you will dodge it.

Charge (Two Types)
  • He does a wind up animation before running forward. He paws the ground with his left foot.
  • Below a certain health, he starts being able to charge 3x in a row.

Swipes (Three Types)

  • Single swipe. Does a 90 degree right turn while doing the swipe.

  • Double swipe.

  • Quadruple swipe.


'Unsorted > Guardian Raids Unsorted' 카테고리의 다른 글

Guardian Raid T2-2: Nakrasena  (0) 2019.03.11
Guardian Raid T2-1: Chromanium  (0) 2019.03.10
Guardian Raid T1-4: Dark Regioros  (0) 2019.03.10
Guardian Raid T1-2: Urunil  (0) 2019.03.10
Guardian Raid T1-1: Lumerus GIF Ver.  (0) 2019.03.10
Posted by Yaen
이전버튼 1 2 3 4 5 이전버튼

블로그 이미지
Yaen
Yesterday
Today
Total

최근에 올라온 글